WorkBuddy Quick Switch to Cloudwise MaaS
Add Cloudwise MaaS as a custom OpenAI-compatible model in WorkBuddy and start using 570+ hosted models for task automation and AI-powered workflows
WorkBuddy is the AI task automation component of the CodeBuddy ecosystem — an end-to-end full-stack development platform. WorkBuddy supports custom OpenAI-compatible models, allowing you to replace or supplement its built-in model list with any Cloudwise MaaS-hosted model in just a few steps.
Table of Contents
Prerequisites
| Requirement | Details |
|---|---|
| WorkBuddy | Installed and running (part of CodeBuddy v4.22.10 or later). |
| Cloudwise API Key | Create or copy your API key from Cloudwise Studio. |
| Endpoint (OpenAI-compatible) | https://api.cloudwise.ai/api/v1/chat/completions |
| Recommended Starter Model | glm-5.1 |
Open the Model Picker
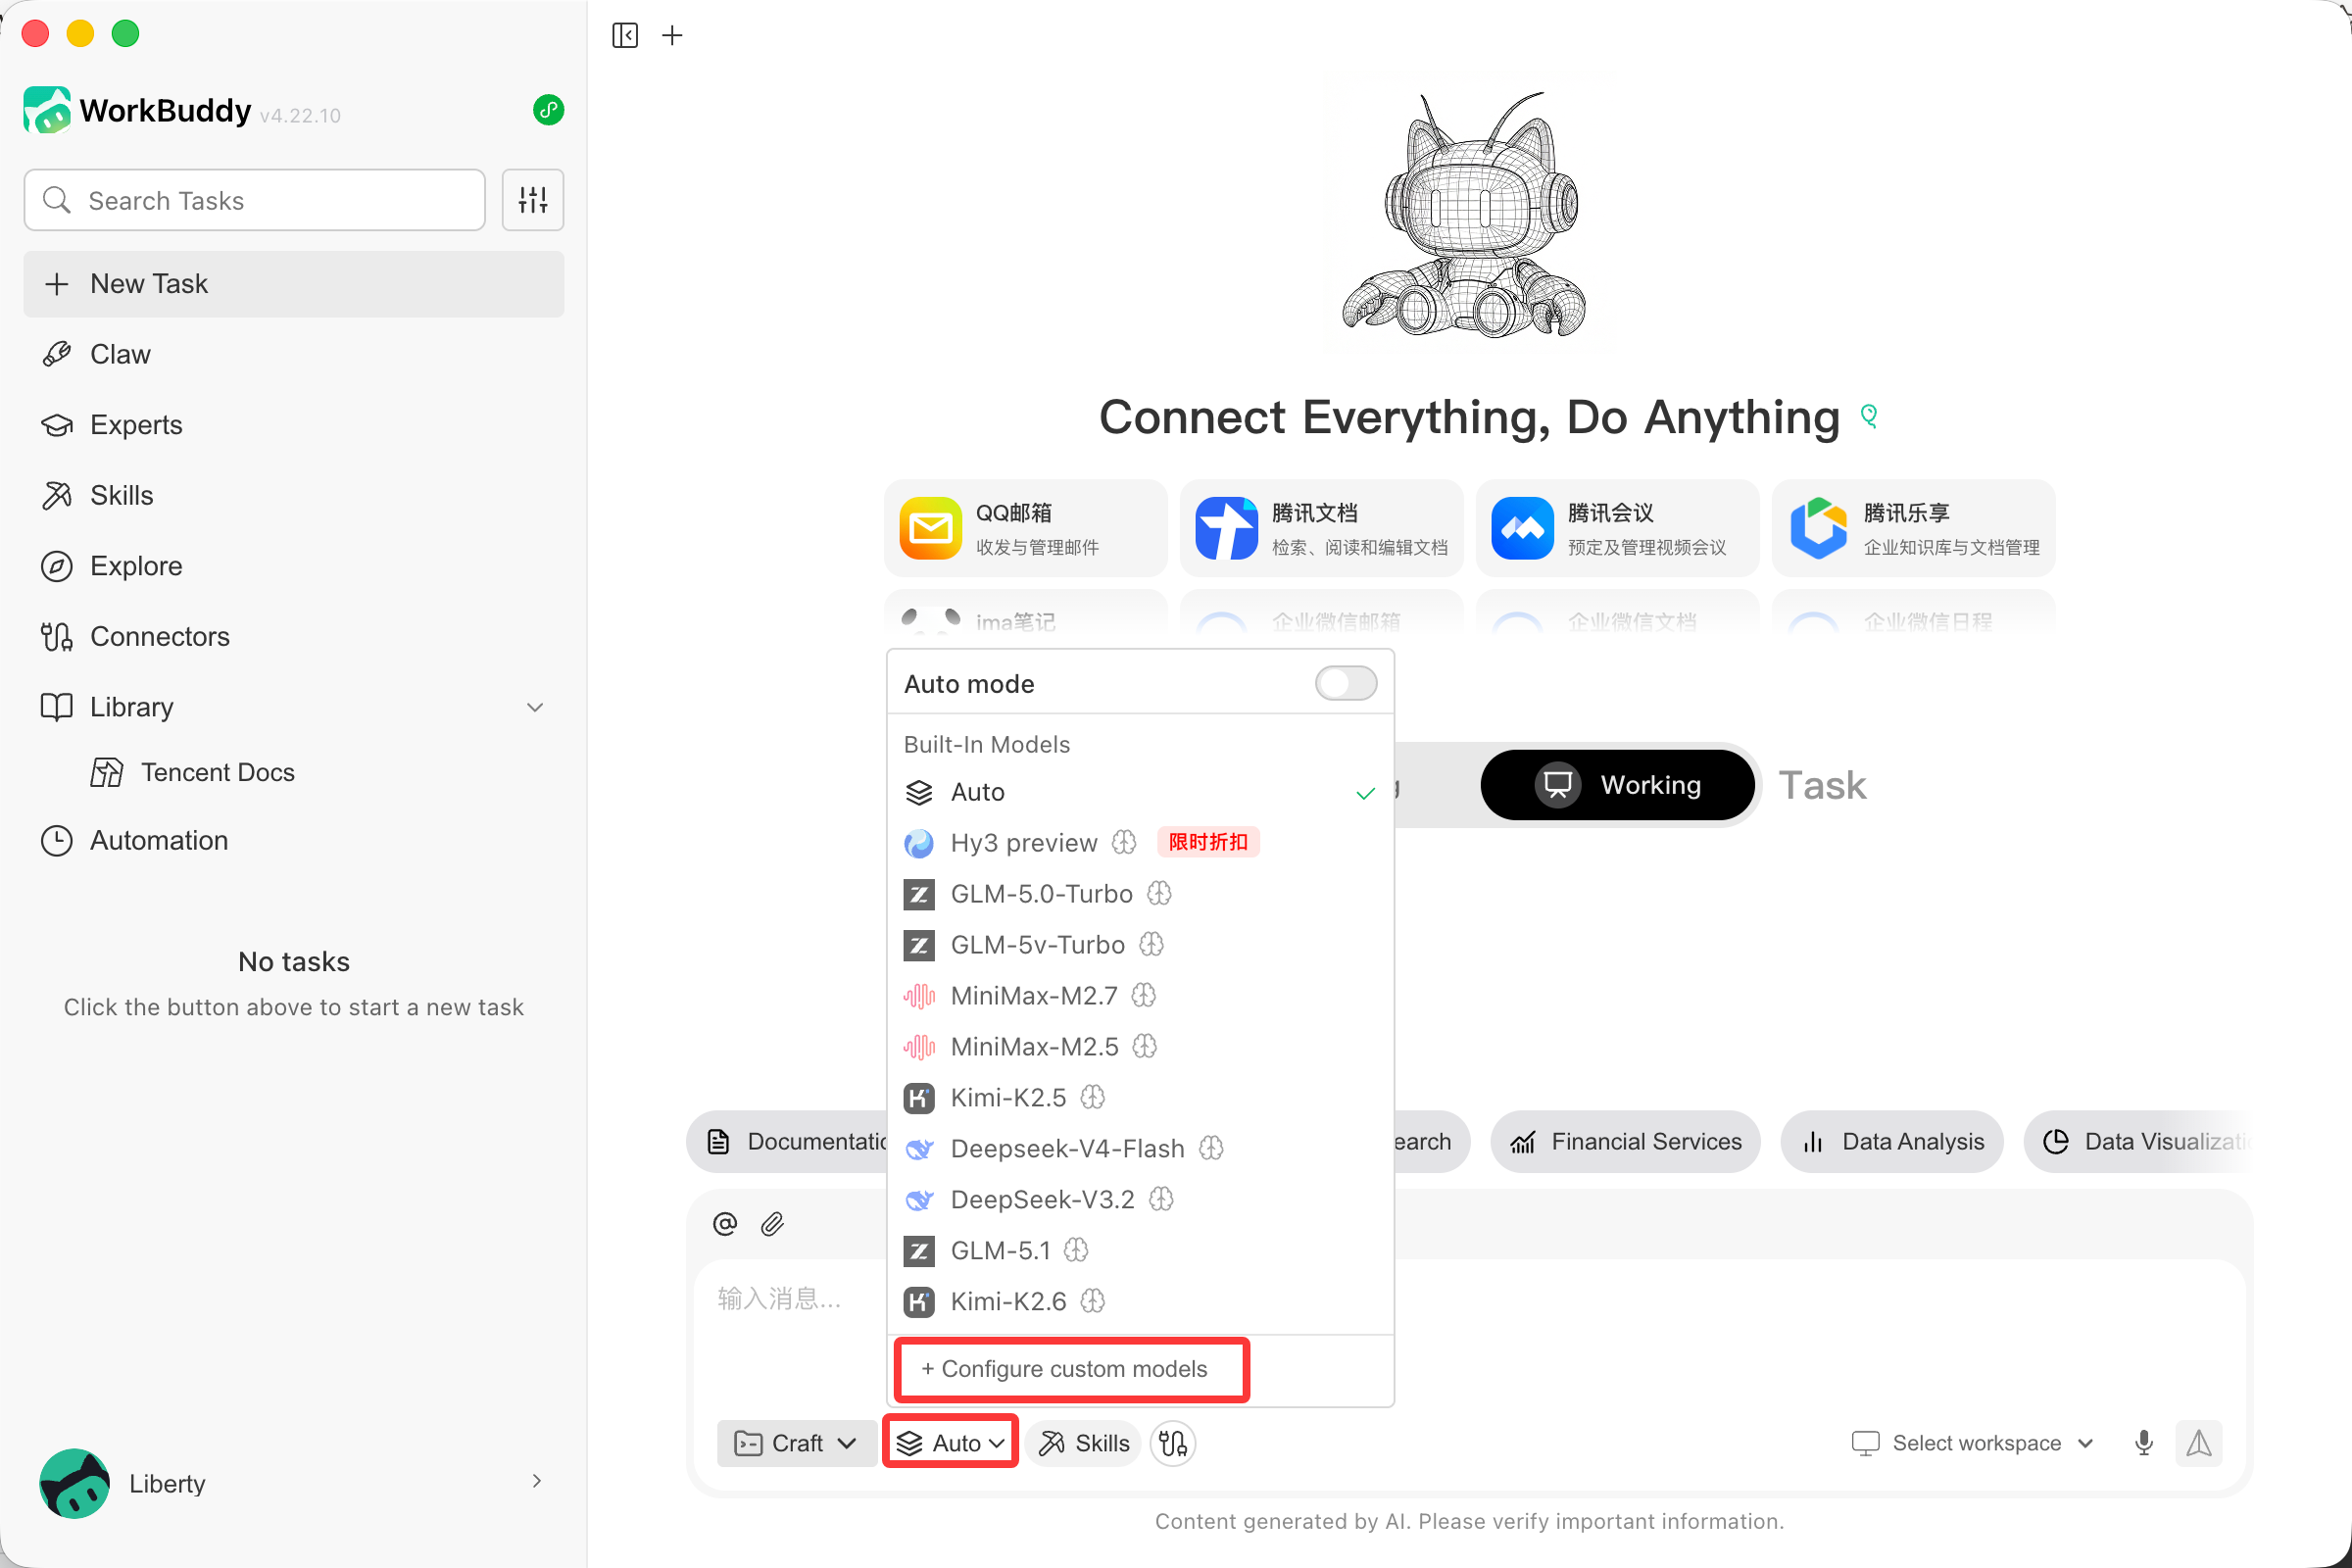
In WorkBuddy, click the model selector at the bottom of the chat panel. The dropdown lists all built-in models. Scroll to the bottom and click + Configure custom models to open the model management settings.
The model picker shows all available built-in models. Click the + Configure custom models button at the bottom of the list (highlighted below) to navigate to the custom model settings.
Select Custom Provider
In the Models settings panel, click Add Model. WorkBuddy will show a provider selection dropdown. Expand the Other section and choose Custom to use any OpenAI-compatible third-party endpoint.
The provider list includes Coding Plans, GLM, Kimi, MiniMax, DeepSeek, and Ollama. Select Custom (under the Other section) to configure any OpenAI-compatible API endpoint.
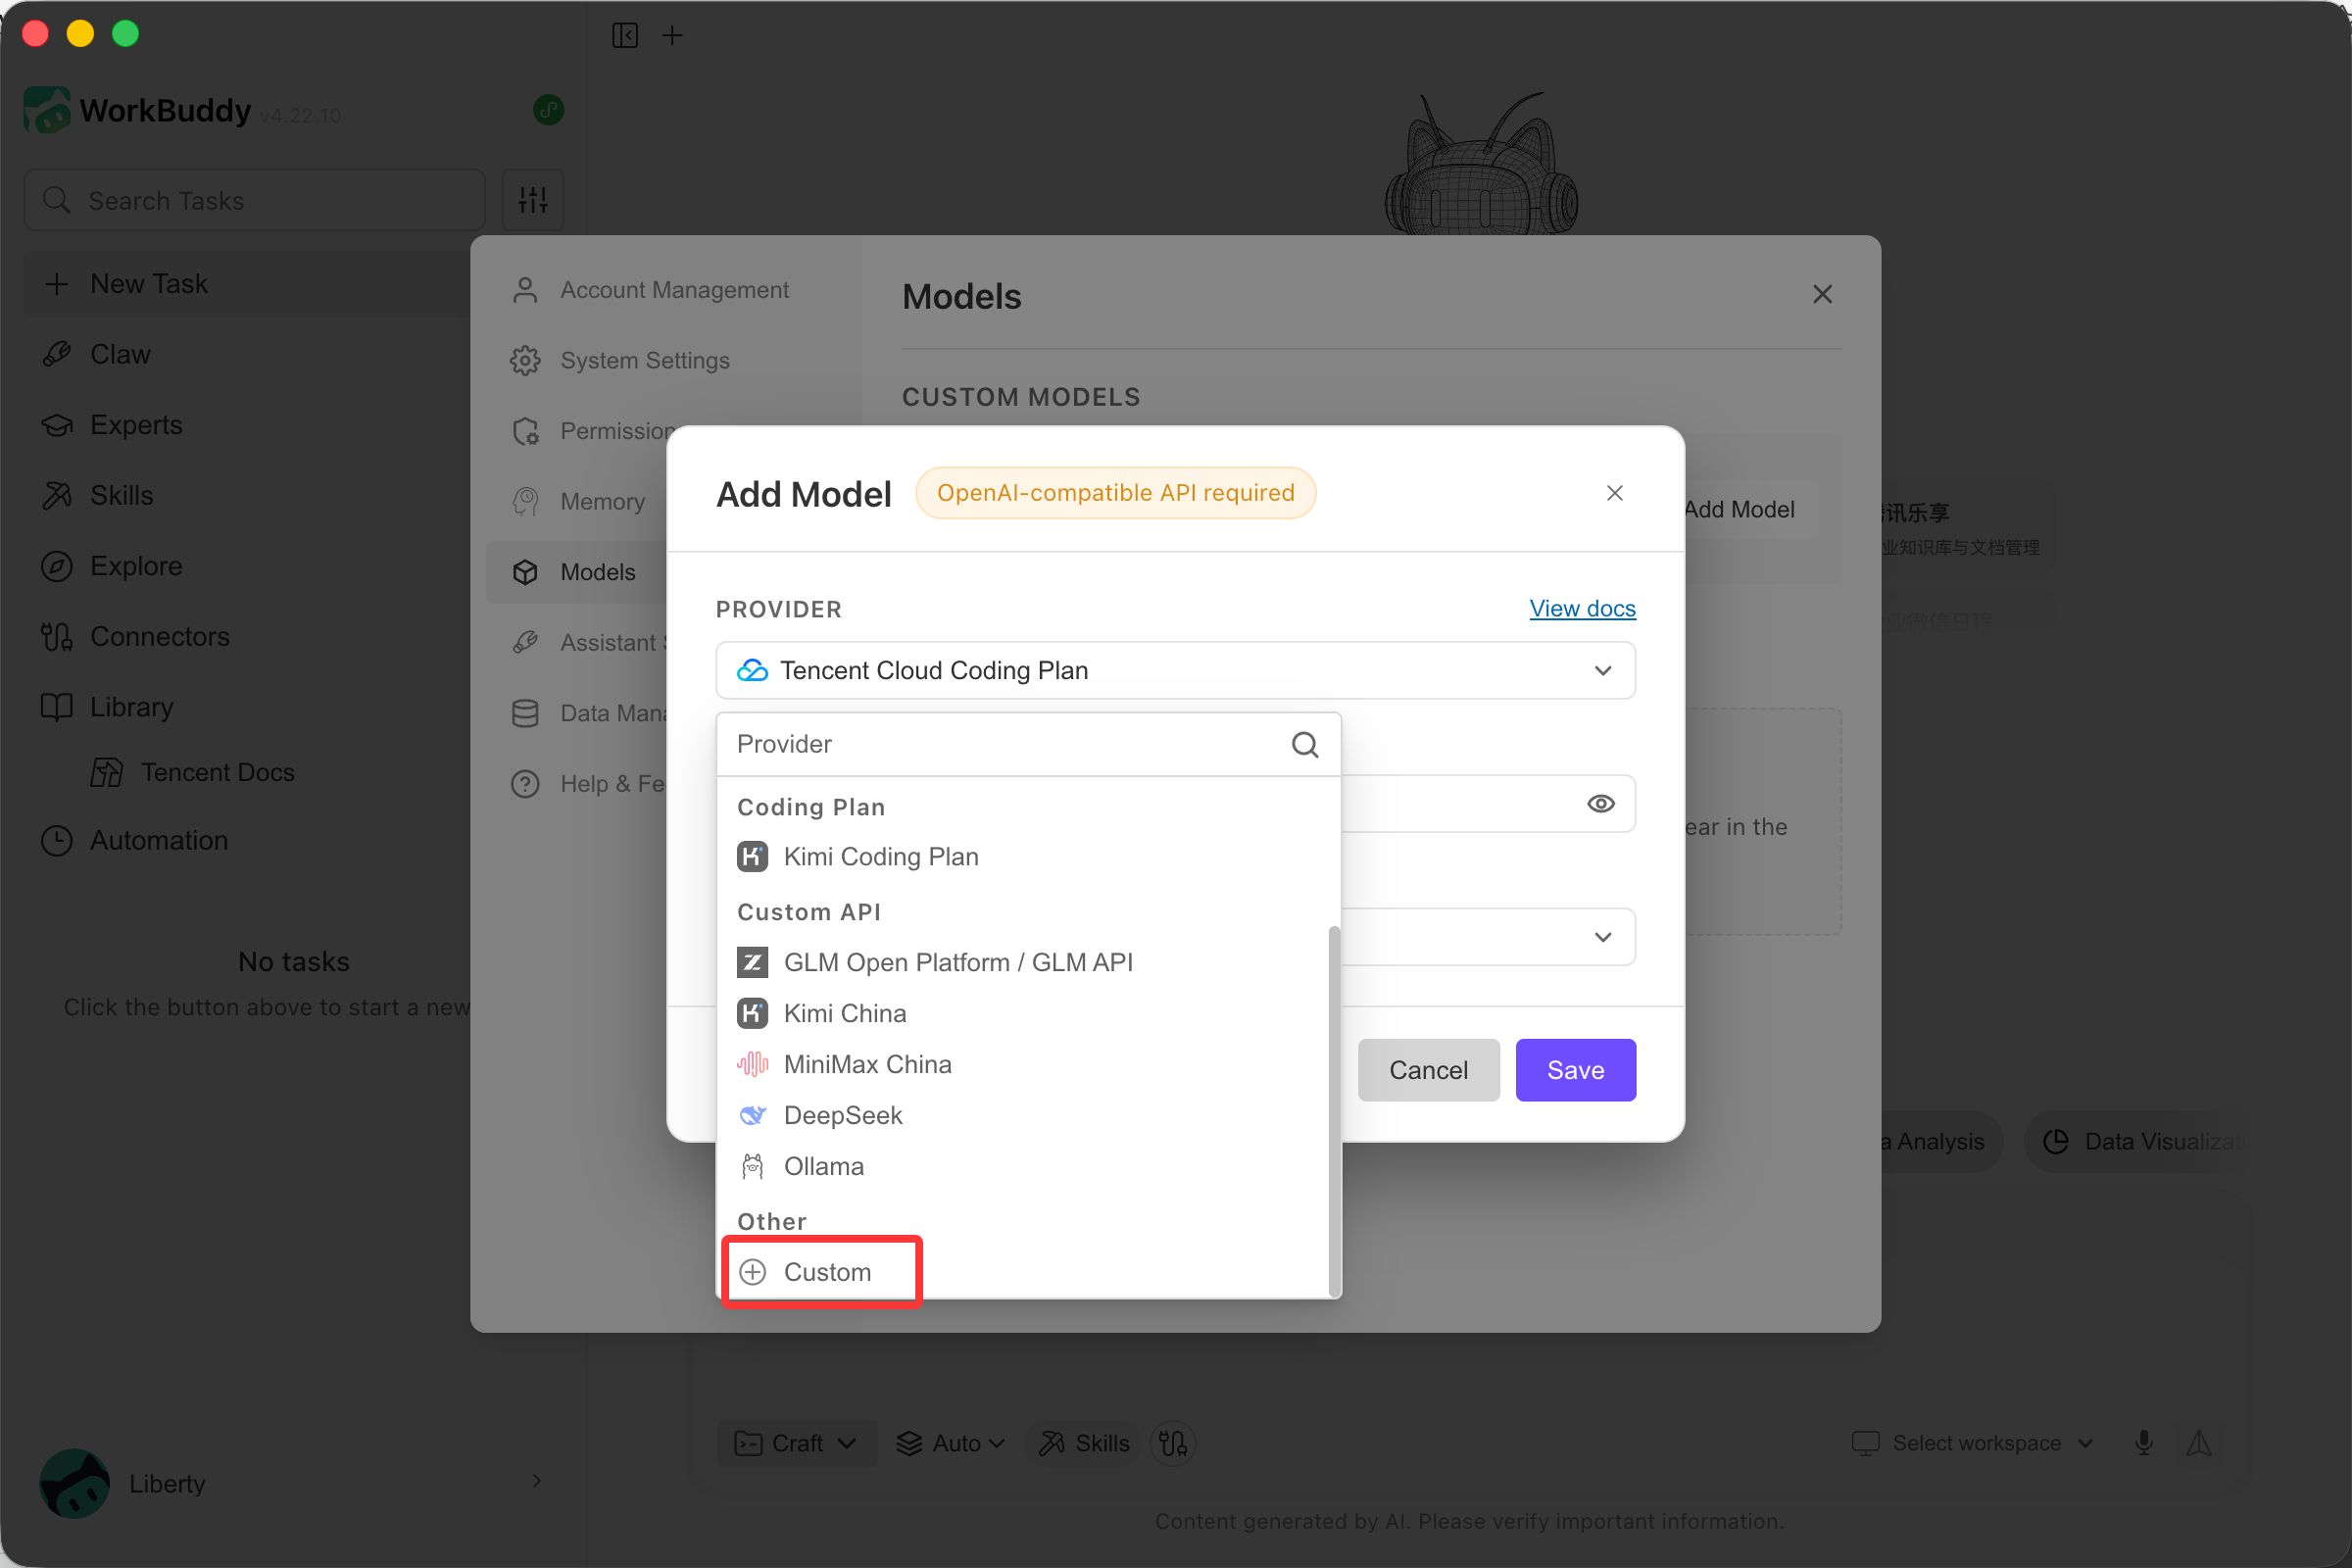
Cloudwise MaaS follows the OpenAI Chat Completions API specification. Always select the Custom provider option — do not use vendor-specific integrations like "GLM Open Platform" or "Kimi China" for Cloudwise endpoints.
Fill in the Model Form
After selecting Custom, fill in the three required fields: Endpoint, API Key, and Model Name.
| Field | Value |
|---|---|
| Provider | Custom |
| Endpoint | https://api.cloudwise.ai/api/v1/chat/completions |
| API Key | Your Cloudwise API key |
| Model Name | glm-5.1 |
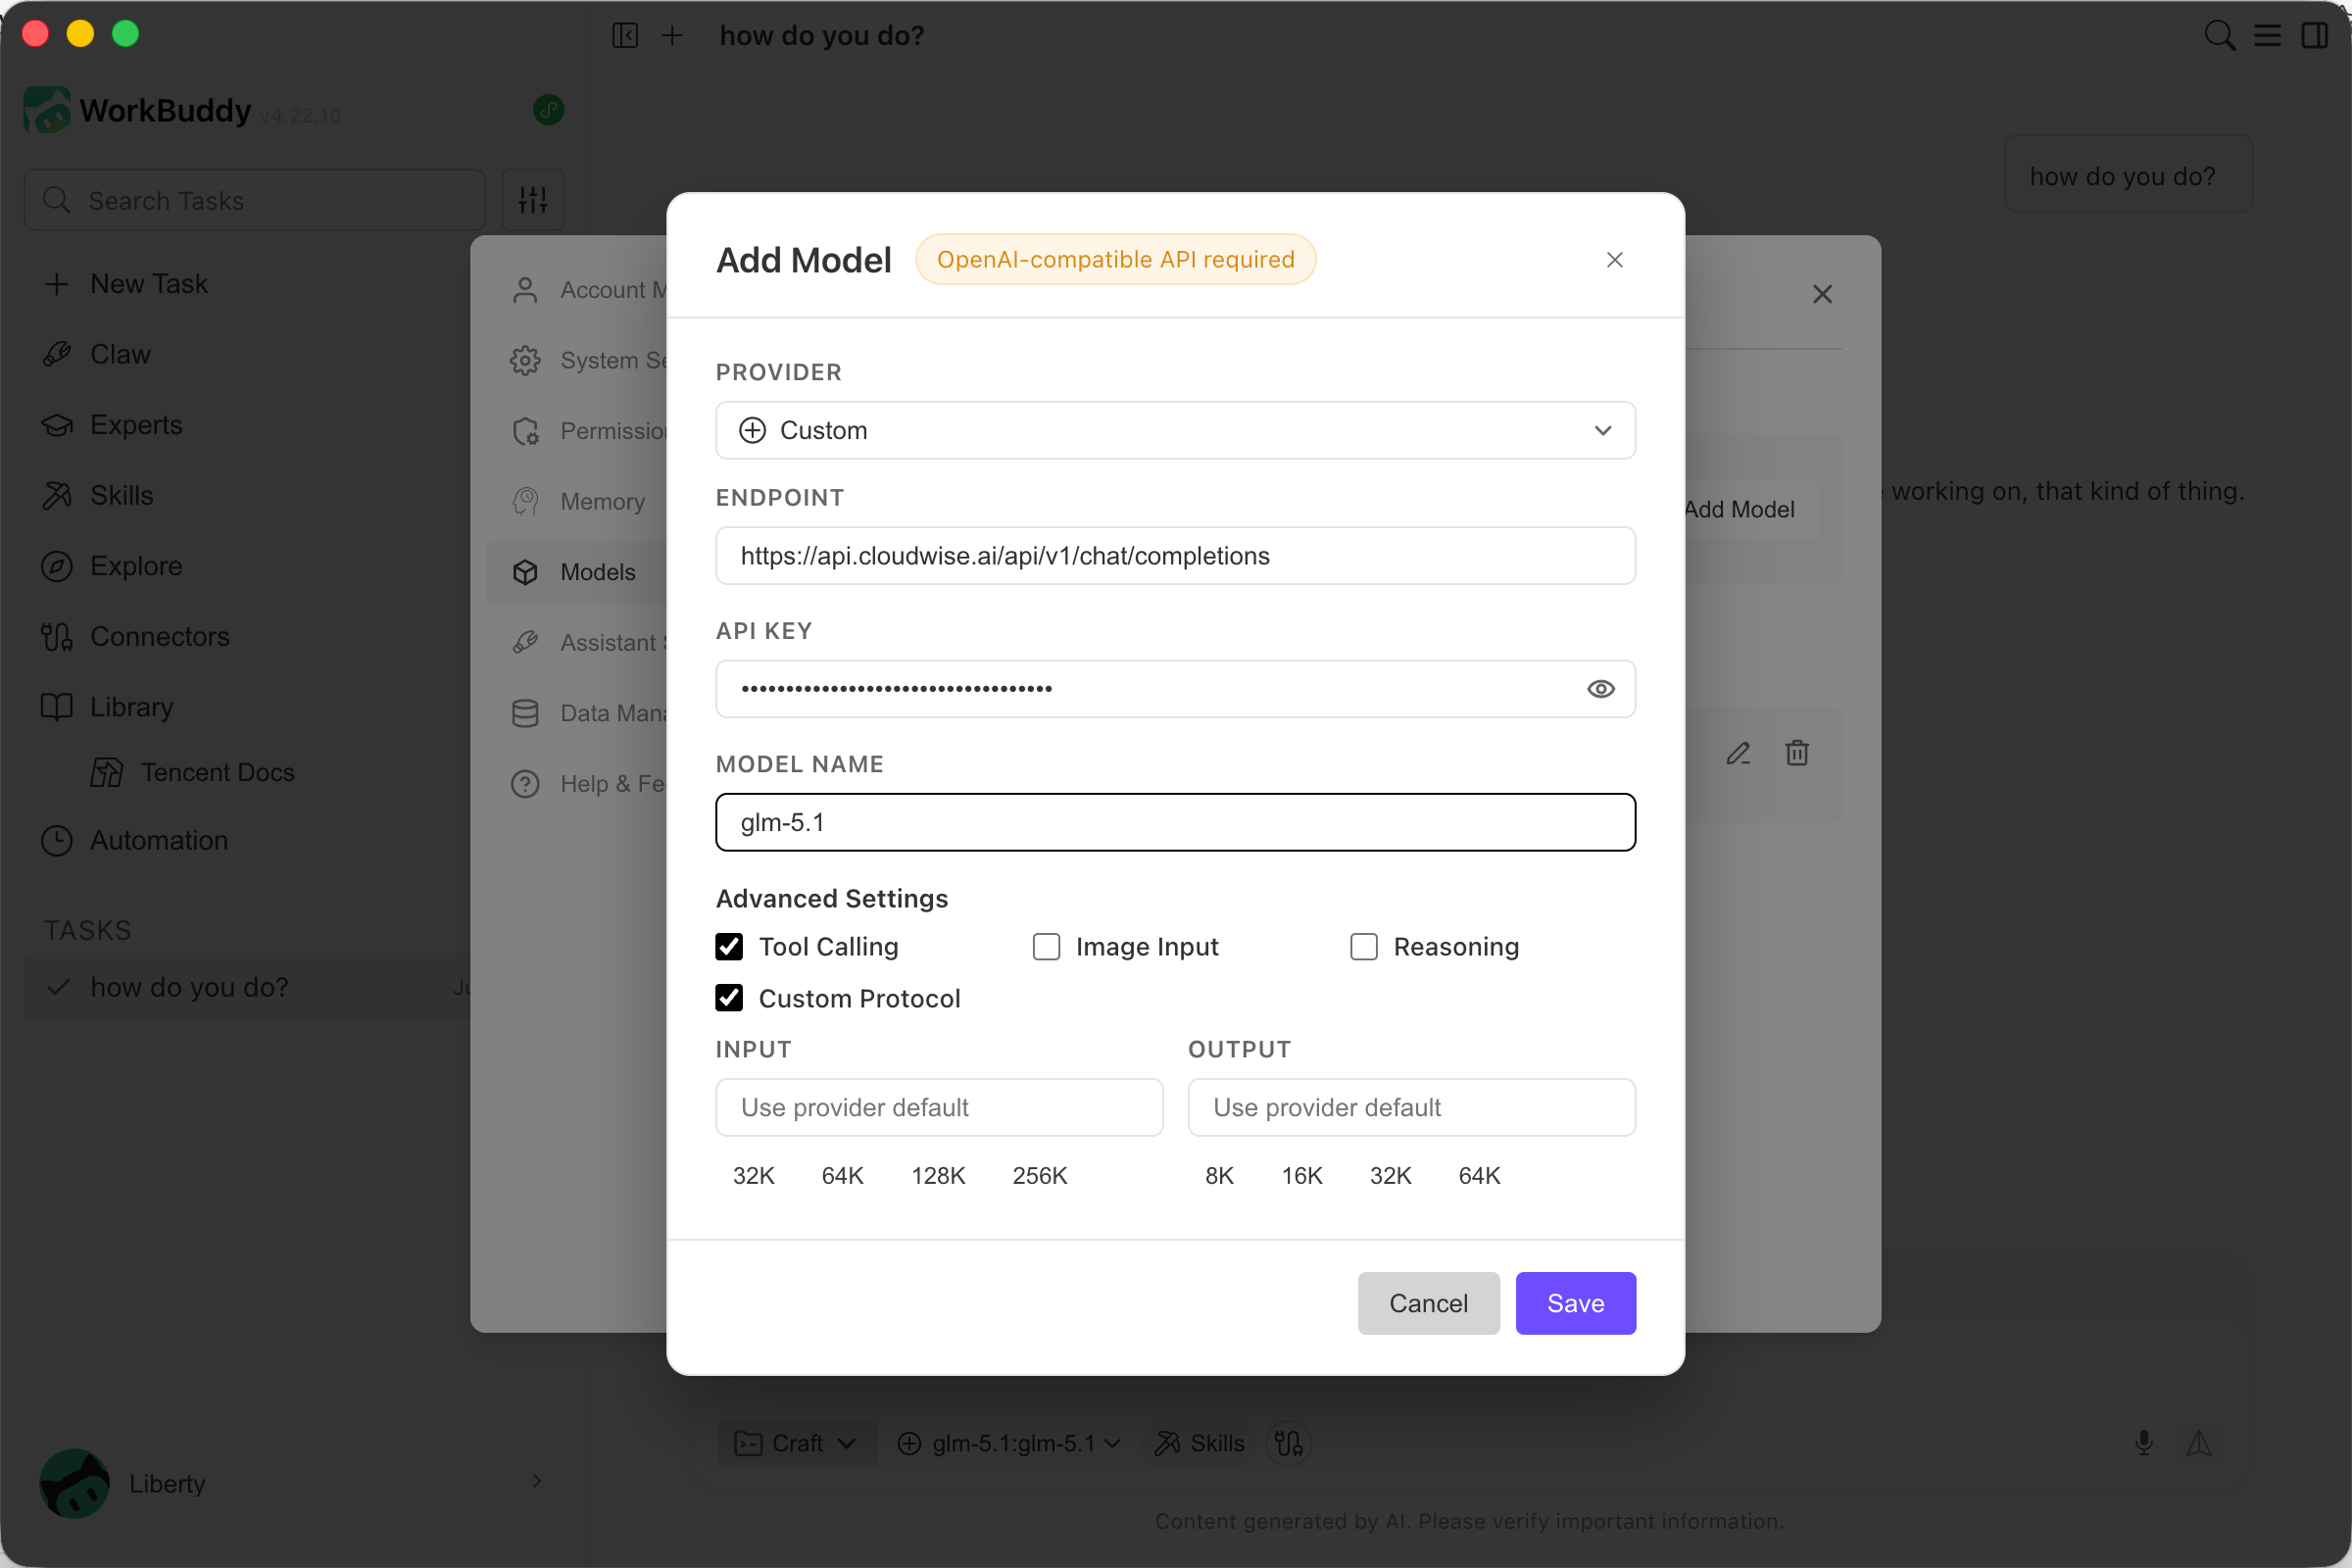
Important: The endpoint must be the full Chat Completions URL ending with /chat/completions. Using the base URL alone (/api/v1) without the path suffix will cause API errors.
Supported Model Names
| Model Name | Use Case |
|---|---|
glm-5.1 | Zhipu's latest flagship model for chat and agentic tasks |
gpt-5.4 | Advanced GPT model for complex reasoning |
gpt-5 | Balanced general-purpose coding and reasoning |
gpt-4o | Fast multimodal interactions |
claude-opus-4-7 | Highest-capability Claude model (via OpenAI-compatible path) |
deepseek-r2 | Open-source reasoning champion |
Configure Advanced Settings
WorkBuddy exposes capability flags under Advanced Settings. Enable the recommended options below to ensure full functionality with Cloudwise MaaS.
In the Advanced Settings section of the Add Model dialog, check the following options:
| Option | Recommended Setting | Purpose |
|---|---|---|
| Tool Calling | ✅ Enabled | Allows the model to invoke tools and connectors in WorkBuddy tasks |
| Image Input | Optional | Enable only if your chosen model supports vision / image input |
| Reasoning | Optional | Enable for reasoning-oriented models (e.g. deepseek-r2) |
| Custom Protocol | ✅ Enabled | Required for non-standard OpenAI-compatible providers like Cloudwise |

You can also set custom Input and Output token limits (32K / 64K / 128K / 256K for input; 8K / 16K / 32K / 64K for output). Leave these as provider defaults unless you need to override them for a specific model.
Alternative Method: Edit the Config File Directly
You can also configure the model by editing the WorkBuddy configuration file manually. First, locate (or create) the config file for your operating system:
macOS / Linux
mkdir -p ~/.workbuddy
code ~/.workbuddy/models.json
If you are not using VS Code, open the file with any text editor, for example:
nano ~/.workbuddy/models.jsonWindows
C:\Users\<your-username>\.workbuddy\models.jsonWrite the following model configuration into the file (using glm-5.1 as an example). Replace the apiKey value with your own Cloudwise API key:
[
  {
    "id": "glm-5.1",
    "name": "glm-5.1",
    "vendor": "Custom",
    "url": "https://api.cloudwise.ai/api/v1/chat/completions",
    "apiKey": "<your-cloudwise-api-key>",
    "maxInputTokens": 262144,
    "maxOutputTokens": 8192,
    "supportsToolCall": true,
    "supportsImages": false,
    "supportsReasoning": false,
    "useCustomProtocol": true
  }
]
The four fields at the bottom correspond directly to the Advanced Settings checkboxes in the UI dialog:
"supportsToolCall": true,
"supportsImages": false,
"supportsReasoning": false,
"useCustomProtocol": true
After saving the configuration file, restart WorkBuddy for the changes to take effect. The Cloudwise MaaS model will then be available in your task and chat sessions.
Verify the Setup
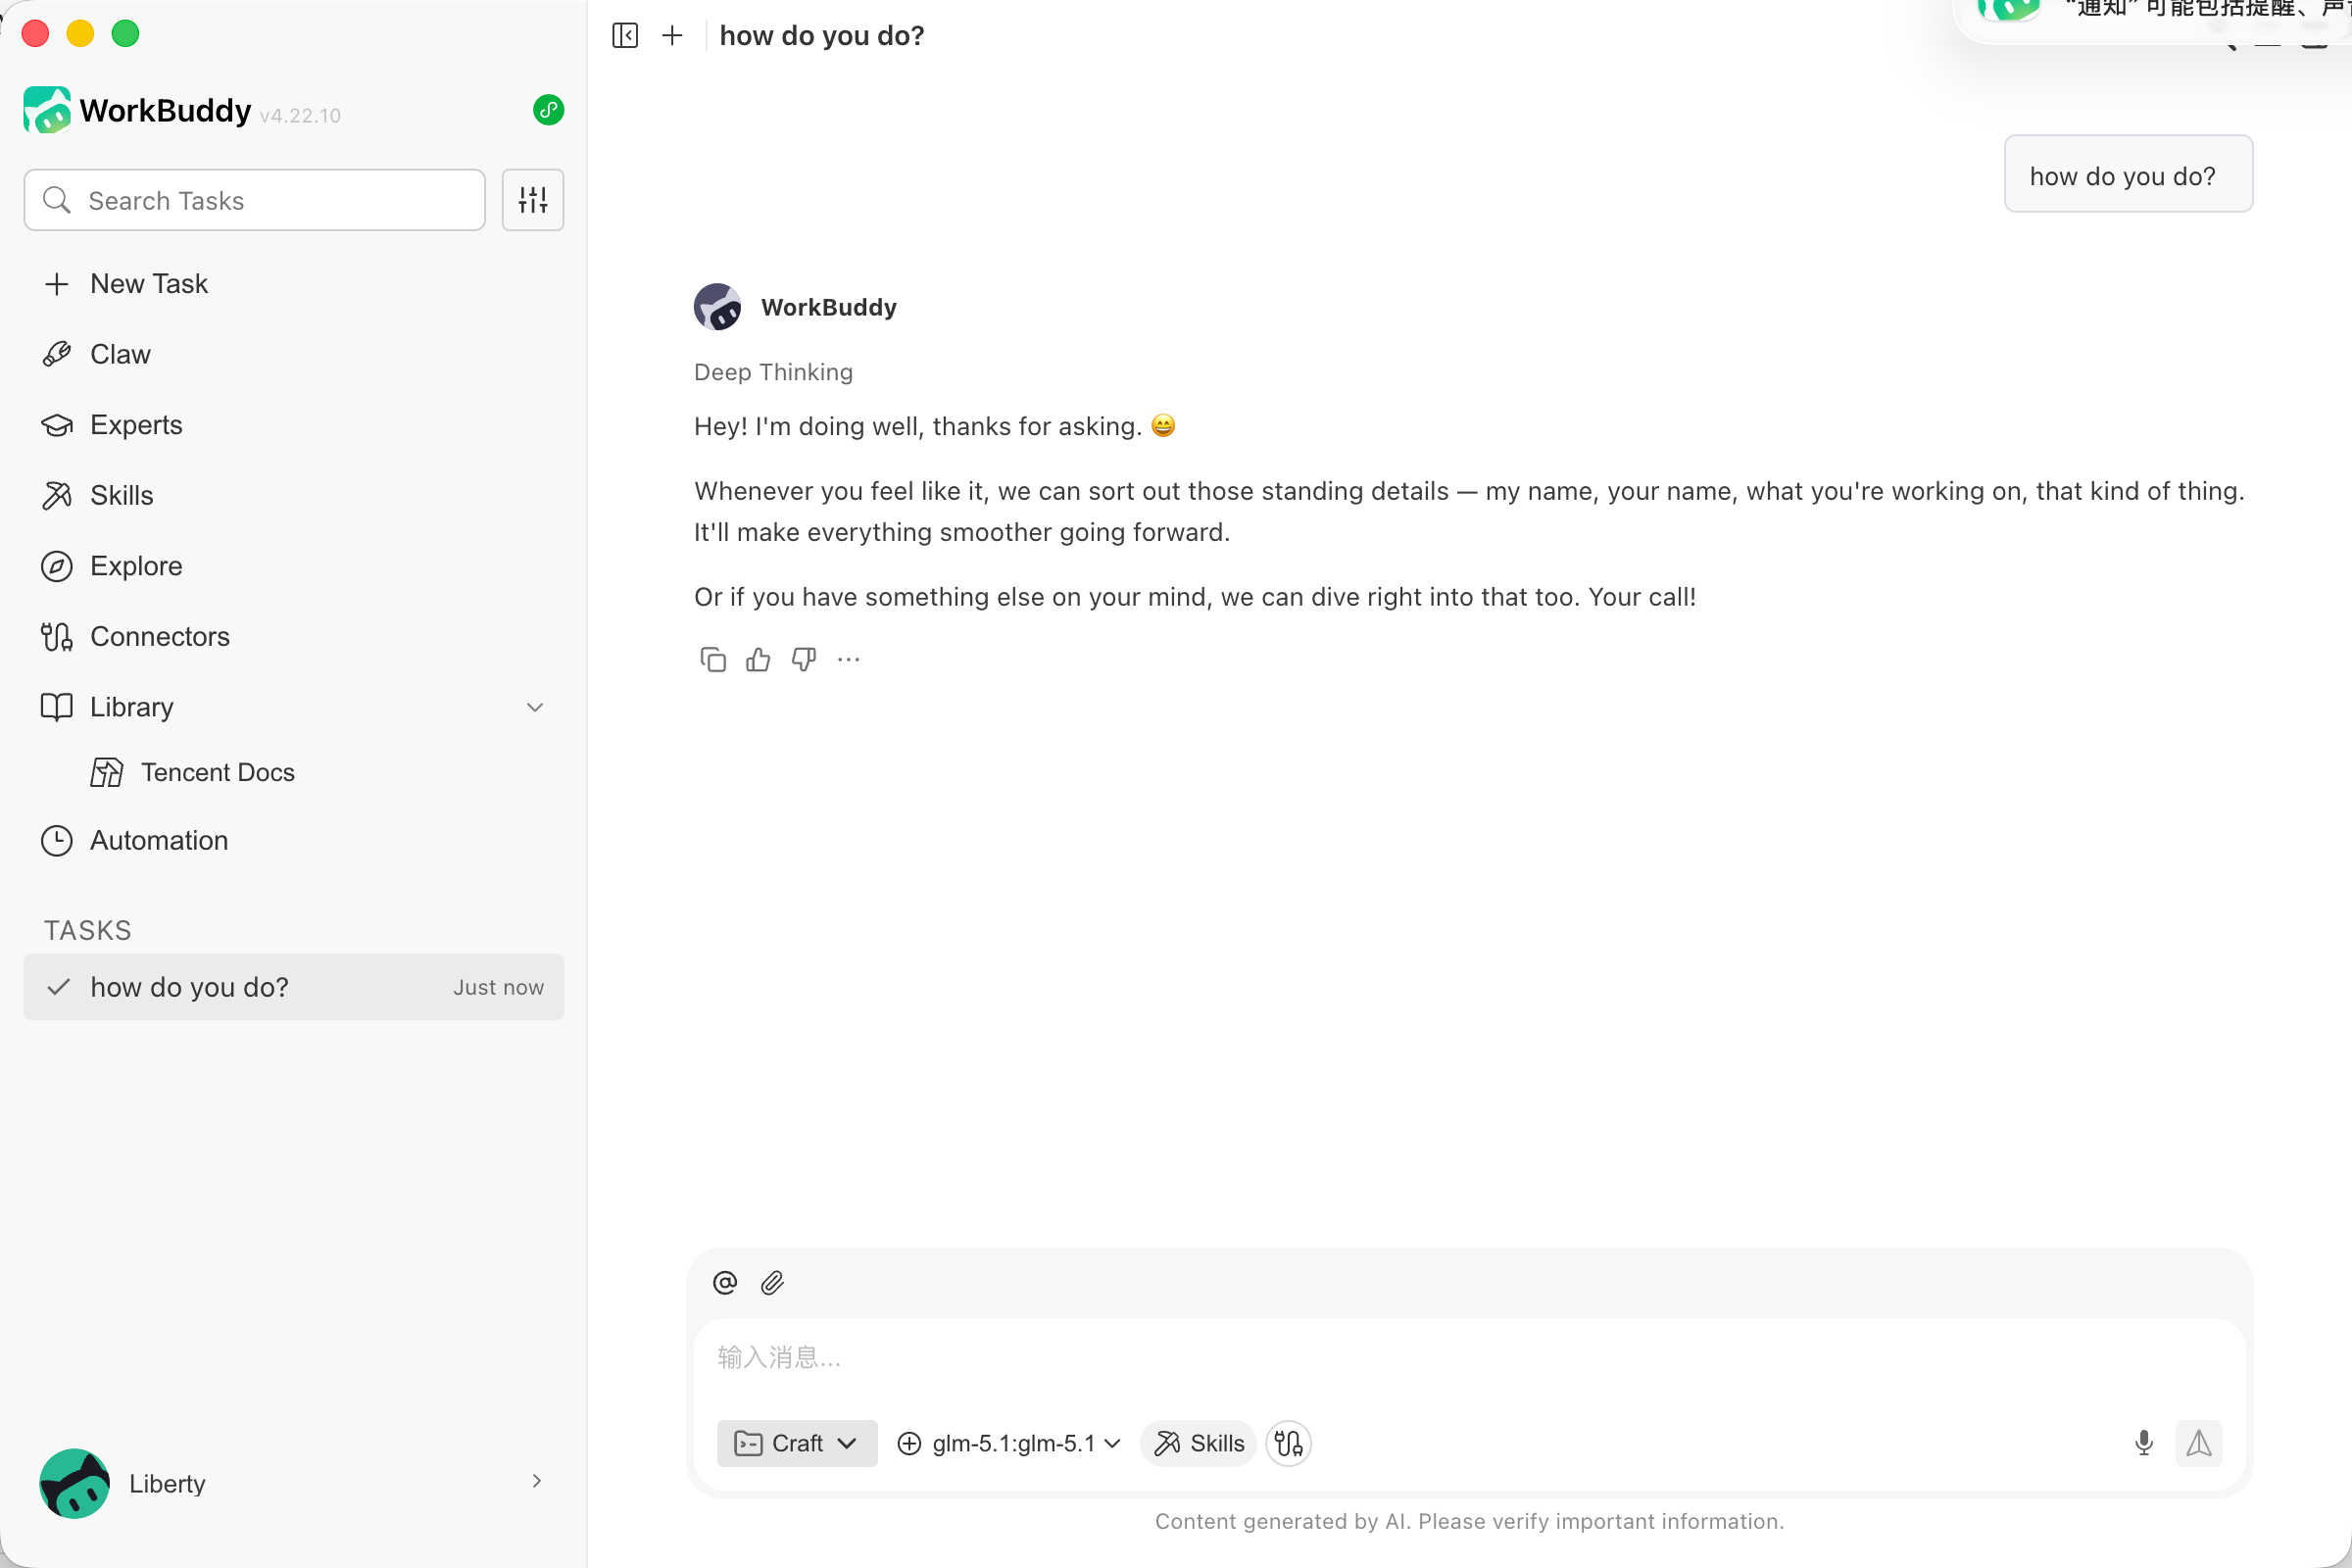
After clicking Save, the model will appear in your custom models list. Open a new task or chat session, select the model from the bottom picker, and send a test message to confirm it responds correctly.
Open a new WorkBuddy task, choose your newly added Cloudwise model from the model selector at the bottom of the chat panel, and send a simple message. A successful response confirms your configuration is working.
Summary
You now have a complete English setup flow for WorkBuddy with Cloudwise MaaS:
- Open the model picker in WorkBuddy and click + Configure custom models
- In the Models settings, click Add Model and select Custom as the provider
- Set the Endpoint to
https://api.cloudwise.ai/api/v1/chat/completions - Enter your Cloudwise API key and a model name (e.g.
glm-5.1) - Enable Tool Calling and Custom Protocol in Advanced Settings, then click Save
- Select the model in any WorkBuddy task or chat and verify it responds correctly